Windows Server Update Services (WSUS)
If you're planning on updating Windows 10 clients, I highly recommend using Windows Server 2016. Trying to use Windows Server 2008 R2 to update Windows 10 machines is an exercise in frustration best not attempted. Otherwise, 2008 R2 should be fine for a few more years for all clients up to Windows 8.1.
Add WSUS Role
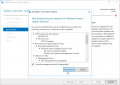
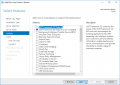
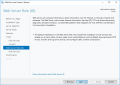
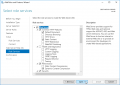
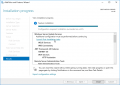
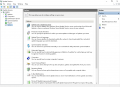
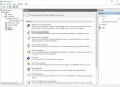
I'm using a fresh Windows Server 2016 install for this guide. Open up the Server Manager and on the Dashboard click Manage > Add/Roles and Features. For Installation Type select Role-based or feature-based installation. For Server Selection select the local server. Under Server Roles select Windows Server Update Services. This will spawn a new dialog box asking you to install the dependencies that WSUS relies upon; select Add Features. Hit Next on the Features page. You'll be greeted with an overview on WSUS, select Next again. For WSUS Role Services select WID Connectivity and WSUS Services (the defaults - unless you have a spare SQL server laying around) and hit Next.
Your WSUS Content location is going to depend on your available space. I recommend creating a folder on a hard disk with at least 100GB of space, preferably a spinning disk dedicated to this task. Select Next to get to an IIS overview where you again click Next (there's a pattern here). Click Next on the IIS Role Services page to accept the defaults. Finally select Install on the Confirm installation selections page.
Once the installation has completed you'll need to Launch Post-Installation tasks. This can be accessed from the Server Manager notifications area if you closed the Add Roles and Features Wizard.
-
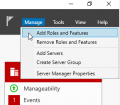 Add Roles and Features
 -
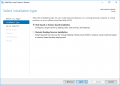 Install Type
 -
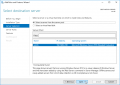 Server Selection
 -
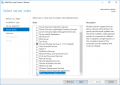 Server Roles
 -
 WSUS Dependencies
 -
 Accept Features
 -
 WSUS Overview
 -
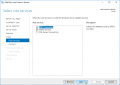 Select role services
 -
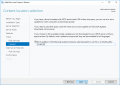 Content location
 -
 IIS Overview
 -
 IIS role services
 -
 Launch Post-Installation tasks


Configure WSUS
 |
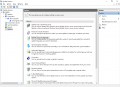
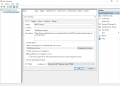
In the Server Manager open Tools -> Windows Server Update Services.
On the left, expand SERVERNAME > Computers > All Computers. You can create computer groups, such as Windows 7, Windows 10, and Windows Server 2016. When your workstations report to WSUS, they’ll appear in the All Computers > Unassigned Computers group, but can be moved as required.
If behind a proxy, click on Options > Source and Proxy Server > Proxy Server (tab). Enter your proxy and port, then click OK.
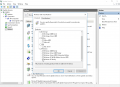
Go to Options > Products and Classifications. By default few products are displayed, but don’t worry. Choose Windows XP as a minimum. It's not important what you select yet, just revel at how short this list is at the moment. It's about to become obnoxiously long. Click the Classifications tab and enable:
- Critical Updates
- Definition Updates
- Security Updates
- Service Packs
- Update Rollups
- Updates
then click OK.
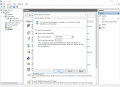
Go to Options > Update Files and Languages > Update Languages (tab) > Download updates only in these languages. Tick English, then click OK.
Go to Synchronization Schedule > Synchronize Automatically. Specify 4:32:10 AM and 1 Synchronizations per day. Click OK.
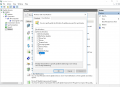
Go to Options > Automatic Approvals. Tick to enable Default Automatic Approval Rule. Just below this, click the Critical Updates link. Tick to enable:
- Critical Updates
- Definition Updates
- Security Updates
- Service Packs
- Update Rollups
- Updates
then click OK, and OK (okay?).
Click Synchronizations (near the top left), then near the top right click Synchronize Now. Wait for the synchronization process to complete, then return back to Options > Products and Classifications. This will now be fully populated. Click additional products such as Windows 7, Windows 10, Windows Server 2016 and Office 2010. Select the Classification tab and choose any new classifications you'd like such as Upgrades. Click OK, then return to Automatic Approvals and change the automatic approval rule to include any new classifications you'd prefer. Head back to Synchronizations then click Synchronize Now again. Understand that if you select a plethora of products you will need quite a bit of space to store all those updates locally. The sync will also take a very long time to download all the update files even if you have a speedy Internet connection.
-
 Add computer groups
 -
 Update Source and Proxy Server
 -
 Products and Classifications
 -
 Products...
 -
 ...and Classifications
 -
 Update Files and Languages
 -
 Synchronization Schedule
 -
 Sync WSUS


Configure clients
 |
 |
To enable your clients to report to your WSUS server, hit <Win> + R or access the Run box and enter gpedit.msc to launch the Group Policy Editor. On the left under Local Computer Policy > Administrative Templates, open Windows Components > Windows Update. Specify the following policies:
Configure Automatic Updates
- Enabled
- 4 - Auto download and schedule the install
- 0 - Everyday
- Select an opportune time
- Check Install updates for other Microsoft products
Specify intranet Microsoft update service location
- Enabled
- Intranet update service for detecting updates - http://SERVERNAME:8530
- Intranet statistics server - http://SERVERNAME:8530
Automatic Updates detection frequency
- Enabled
- 1 to 3 hours, preferably
Allow non-administrators to receive update notifications
- Disabled
Allow Automatic Updates immediate installation
- Enabled
No auto-restart with logged on users for scheduled automatic updates installations
- Enabled
Reschedule Automatic Updates scheduled installations
- Enabled
- 15 Minutes
Allow signed updates from an Intranet Microsoft Update service location
- Disabled
Your clients will then start reporting to the WSUS server instead of Windows Update. Reboot your client if you're paranoid that the settings haven't been reloaded. This is Windows, after all.
Maintenance
You will periodically want to clean up and compress older updates to keep your storage requirements in check. You can manually do this by going to Options > Server Cleanup Wizard. This isn't a task you would want to do every day though. Automation comes to the rescue in the form of this script and a scheduled task. Save this Powershell script as a .ps1 file somewhere convenient:
C:\Users\Administrator\Desktop\Cleanup\Invoke-WSUSClean.ps1
Add-Type -Path "C:\Program Files\Update Services\API\Microsoft.UpdateServices.Administration.dll"

$todah = Get-Date -format "yyyy.MM.dd"
$UseSSL = $False
$PortNumber = 8530
$Server = "Localhost"
$ReportLocation = "C:\Users\Administrator\Desktop\Cleanup\Reports\" + $todah + ".html"
$SMTPServer = "smtp.example.com"
$To = "Me <you@example.com>"
$FROM = "WSUS Cleanup <wsus@example.com>"

$WSUSConnection = [Microsoft.UpdateServices.Administration.AdminProxy]::GetUpdateServer($Server,$UseSSL,$PortNumber)

#Clean Up Scope
$CleanupScopeObject = New-Object Microsoft.UpdateServices.Administration.CleanupScope
   $CleanupScopeObject.CleanupObsoleteComputers = $True
   $CleanupScopeObject.CleanupObsoleteUpdates = $True
   $CleanupScopeObject.CleanupUnneededContentFiles = $True
   $CleanupScopeObject.CompressUpdates = $True
   $CleanupScopeObject.DeclineExpiredUpdates = $True
   $CleanupScopeObject.DeclineSupersededUpdates = $True

$CleanupTASK = $WSUSConnection.GetCleanupManager()

$Results = $CleanupTASK.PerformCleanup($CleanupScopeObject)

$DObject = New-Object PSObject
   $DObject | Add-Member -MemberType NoteProperty -Name "SupersededUpdatesDeclined" -Value $Results.SupersededUpdatesDeclined
   $DObject | Add-Member -MemberType NoteProperty -Name "ExpiredUpdatesDeclined" -Value $Results.ExpiredUpdatesDeclined
   $DObject | Add-Member -MemberType NoteProperty -Name "ObsoleteUpdatesDeleted" -Value $Results.ObsoleteUpdatesDeleted
   $DObject | Add-Member -MemberType NoteProperty -Name "UpdatesCompressed" -Value $Results.UpdatesCompressed
   $DObject | Add-Member -MemberType NoteProperty -Name "ObsoleteComputersDeleted" -Value $Results.ObsoleteComputersDeleted
   $DObject | Add-Member -MemberType NoteProperty -Name "DiskSpaceFreed" -Value $Results.DiskSpaceFreed

#HTML style
$HeadStyle = "<style>"
$HeadStyle = $HeadStyle + "BODY{background-color:#003366;}"
$HeadStyle = $HeadStyle + "TABLE{width: 100%;border-width: 1px;border-style: solid;border-color: black;border-collapse: collapse;}"
$HeadStyle = $HeadStyle + "TH{border-width: 1px;padding: 0px;border-style: solid;border-color: black;background-color:#3D3D3D;}"
$HeadStyle = $HeadStyle + "TD{border-width: 1px;padding: 0px;border-style: solid;border-color: black;background-color:#666666;}"
$HeadStyle = $HeadStyle + "</style>"

$Date = Get-Date

$DObject | ConvertTo-Html -Head $HeadStyle -Body "<font color=#FFFFFF><h2>$($ENV:ComputerName) WSUS Report: $date</h2>" | Out-File $ReportLocation

Send-MailMessage -To $To -from $FROM -subject "WSUS Clean Up Report" -smtpServer $SMTPServer -Attachments $ReportLocation
Configure scheduled task
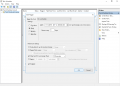
Open up Control Panel > Administrative Tools > Task Scheduler. On the left, select Task Scheduler Library. On the right now, select Create Task.... Fill out a name and description, then select Run whether user is logged on or not so you don't have to remain logged in at all times.
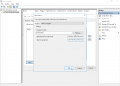
Select the Triggers tab and click New. Choose Daily and set it for some time after your synchronizations are likely to be completed.
Select the Actions tab and click New.... For Action select Start a program. In the Program/script: box, type PowerShell. Under Add arguments (optional):, type C:\Users\Administrator\Desktop\Cleanup\Invoke-WSUSClean.ps1. Under Start in (optional):, type C:\Users\Administrator\Desktop\Cleanup\. Click OK, then click OK again. This will prompt for Administrator's password. Enter it and hit OK. Congrats, you're cleaning up every morning automagically now.
-
 Create a scheduled task
 -
 Set a name
 -
 Set a trigger
 -
 Set your script as the action